VMware Sensor Deployment
Minimum Requirements
- Access to VMware ESXi 6.5 or later, including the free version.
- Dedicated 4 CPUs and 12 GB of reserved memory.
- Dedicated 150 GB of disk space (100 GB data device and 50 GB root device).
- Internet connectivity to the network where you plan to install the VMware Sensor.
Recommended Requirements
- A VMware vSphere or VMware vCenter user account to use for USM Anywhere Sensor configuration with an assigned role that has permissions equivalent to the read-only default role.
- Installed VMware Tools for hosts in your vSphere or vCenter environment.
- If Dynamic Host Configuration Protocol (DHCP) is not available, a configured static IP for the management interface and local Domain Name System (DNS) information.
- Port mirroring set up for network monitoring (see Direct Traffic from Your Physical Network to the VMware Sensor for more information).
- Administrative credentials for devices that require configuration to forward logs to the VMware Sensor.
- Administrative credentials for remote hosts to support authenticated asset scans.
- Configuration on firewall or other security device to send UDP or TCP syslog (if it is capable of exporting security logs through UDP or TCP syslog).
- Network topology information to run asset discovery.
- To access network-based intrusion detection system (NIDS) functionality on the sensor, an ethernet port on the host must be available to receive data from a Switched Port Analyzer (SPAN) or Test Access Point (TAP) port.
Sensor Ports and Connectivity
| Type | Ports | Endpoints | Purpose |
|---|---|---|---|
| TCP | 443 | update.alienvault.cloud | Communication with AT&T Cybersecurity for initial setup and future updates of the sensor. |
| TCP | 443 | reputation.alienvault.com | Ongoing communication with AT&T Alien Labs™ Open Threat Exchange® (OTX™). |
| TCP | 443 | otx.alienvault.com | Ongoing communication with OTX to retrieve vulnerability scores. Connecting to otx.alienvault.com is not required but highly recommended. OTX uses the AWS Cloudfront services. Refer to the AWS IP address ranges page when you deploy a new sensor. This page contains the current IP address ranges for the service and instructions on how to filter the addresses. |
| TCP | 443 | Your USM Anywhere subdomain Your USM Anywhere subdomain | Ongoing communication with USM Anywhere. |
| TCP | 9443 | vCenter Server | Authenticate sensor to ESXi. Connect to the vCenter for VMware configuration to gather data directly from vCenter. |
| SSL/TCP | 7100 | Your USM Anywhere subdomain Your USM Anywhere subdomain | Ongoing communication with USM Anywhere. |
| UDP | 53 | DNS Servers (Google Default) | Ongoing communication with USM Anywhere. |
| UDP | 123 | 0.pool.ntp.org 1.pool.ntp.org 2.pool.ntp.org 3.pool.ntp.org | Sync with network time protocol (NTP) services. |
| TCP | 22 and 443 | prod-usm-saas-tractorbeam.alienvault.cloud prod-gov-usm-saas-tractorbeam.gov.alienvault.us (for AT&T TDR for Gov) | SSH communications with the USM Anywhere remote support server. See Troubleshooting and Remote Sensor Support for more information about remote technical support through the USM Anywhere Sensor console. |
| TCP | 443 | geoip-us-west-2-prod.alienvault.cloud geoip-us-east-1-prod.alienvault.cloud geoip-sa-east-1-prod.alienvault.cloud geoip-eu-west-1-prod.alienvault.cloud geoip-eu-west-2-prod.alienvault.cloud geoip-eu-central-1-prod.alienvault.cloud geoip-ca-central-1-prod.alienvault.cloud geoip-ap-southeast-2-prod.alienvault.cloud geoip-ap-northeast-1-prod.alienvault.cloud | Allows resolution of IP addresses for geolocation services. It is only necessary to whitelist the GeoIP address that corresponds to the region where your USMA instance is hosted. |
| Type | Ports | Purpose |
|---|---|---|
| SSH | 22 | Inbound method for secure remote login from a computer to USM Anywhere. |
| HTTP | 80 | Inbound communication for HTTP traffic. |
| UDP (RFC 3164) | 514 | USM Anywhere collects data through syslog over UDP on port 514 by default. |
| TCP (RFC 3164) | 601 | Inbound communication for reliable syslog service. USM Anywhere collects data through syslog over TCP on port 601 by default. |
| TCP (RFC 5424) | 602 | USM Anywhere collects data through syslog over TCP on port 602 by default. |
| Traffic Mirroring | 4789 | Inbound communication for virtual extensible local area network (VXLAN). |
| WSMANS | 5987 | Inbound WBEM WS-Management HTTP over Secure Sockets Layer/Transport Layer Security (SSL/TLS) (NXLog). |
| TLS/TCP (RFC 3164) | 6514 | USM Anywhere collects TLS-encrypted data through syslog over TCP on port 6514 by default. |
| TLS (RFC 5424) | 6515 | USM Anywhere collects data through syslog over TLS on port 6515 by default. |
| Graylog | 12201 | Inbound communication for Graylog Extended Log Format (GELF). |
USM Anywhere IP Addresses for Whitelisting
| Code | Name | Reserved Static IP Address Ranges |
|---|---|---|
| ap-northeast-1 | Asia Pacific (Tokyo) | 18.177.156.144/28 3.235.189.112/28 44.210.246.48/28 |
| ap-south-1 | Asia Pacific (Mumbai) | 3.7.161.32/28 3.235.189.112/28 44.210.246.48/28 |
| ap-southeast-2 | Asia Pacific (Sydney) | 3.25.47.48/28 3.235.189.112/28 44.210.246.48/28 |
| ca-central-1 | Canada (Central) | 3.96.2.80/28 3.235.189.112/28 44.210.246.48/28 |
| eu-central-1 | Europe (Frankfurt) | 18.156.18.32/28 3.235.189.112/28 44.210.246.48/28 |
| eu-west-1 | Europe (Ireland) | 3.250.207.0/28 3.235.189.112/28 44.210.246.48/28 |
| eu-west-2 | Europe (London) | 18.130.91.160/28 3.235.189.112/28 44.210.246.48/28 |
| sa-east-1 | South America (São Paulo) | 18.230.160.128/28 3.235.189.112/28 44.210.246.48/28 |
| us-east-1 | US East (N. Virginia) | 3.235.189.112/28 44.210.246.48/28 |
| us-west-2 | US West (Oregon) | 44.234.73.192/28 3.235.189.112/28 44.210.246.48/28 |
| us-gov-west-1 | AWS GovCloud (US-West) | 3.32.190.224/28 |
Create the VMware Virtual Machine
- VMware ESXi Patch Tracker: https://esxi-patches.v-front.de/ESXi-6.5.0.html
- VMware ESXi Embedded Host Client: https://labs.vmware.com/flings/esxi-embedded-host-client
- Go to the USM Anywhere Sensor Downloads page and click the
 icon of your specific sensor. After clicking, your browser starts to download the USM Anywhere Sensor package. Depending on your Internet connection, the download can take 30 minutes or more.
 - Extract the USM Anywhere Sensor package to any folder on the machine where you are using the vSphere client.
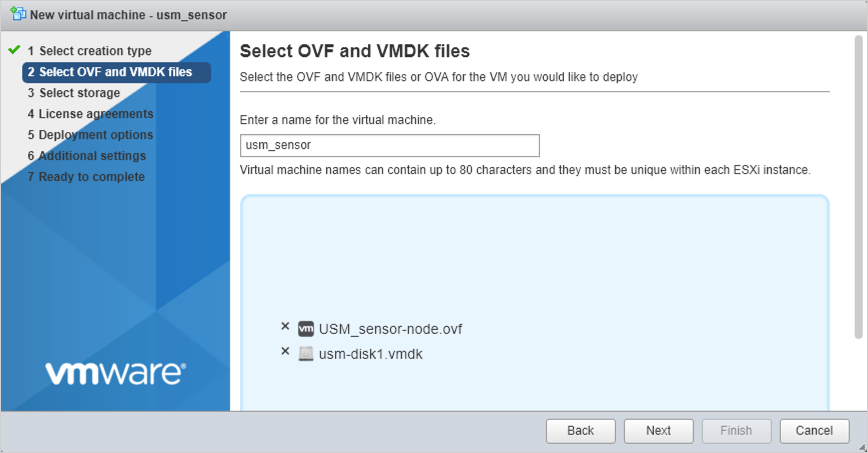
- In your ESXi Web Client, click Create/Register VM.This opens the New virtual machine wizard.
- In the Select creation type page, choose Deploy a virtual machine from an OVF or OVA file and click Next.
- Enter a name for the new VM and select the template files.
- Browse to the location where you extracted the files from the sensor download package, select the OVF and VMDK files, and click Next.
- For each of the wizard pages, set the parameters as needed for your network and click Next:
- Select storage: Select the datastore you want to use for the VM.
- Deployment options: Set the networking and deployment for the VM.
- Clear the Power on automatically option. It is important to create the VM without powering it on so that you can configure the ISO file before the initial boot.
In the Ready to complete panel, review the configuration and click Finish.
An alert appears that says "A required disk image was missing". Ignore this message, because you will address the disk image in the next step.
Import of the OVF and VMDK files and the creation of the virtual image can take some time. You can check the status in the Recent Tasks window.
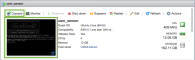
- After the VM is created but not yet powered on, configure the correct ISO file, deploy_config.iso, for the datastore:
If you see REPLACEME as the initial login password in the sensor welcome screen when you connect to the VM, it is most likely that the ISO was not mounted before the sensor was started. If this happens, you must shut down the VM, complete this step so that the ISO is configured for the datastore, and then begin the deployment process anew.
- Upload the deploy_config.iso file to your datastore. You can use the datastore browser in the web client to select the ISO file and upload it.
- Select the new sensor VM in the left pane and scroll to the Hardware Configuration section.
- Locate CD/DVD drive 1 in the hardware list and click Select disc image.
- Navigate the datastore and select the deploy_config.iso file.
- Click Select.
- In the toolbar, click Power on to start the USM Anywhere Sensor VM.
Connect to the console for the USM Anywhere Sensor using one of the following methods:
- In the toolbar, click Console.
- Click the thumbnail for the sensor VM.

Set Up USM Anywhere on the VMware Virtual Machine
Change the Administrative Password and Keyboard Layout
- Log in using the credentials displayed in the console screen.

- (Optional.) Configure the keyboard if you use a keyboard layout other than the U.S. default.
- Set a new password for the sysadmin user.

- If your system sets an IP address automatically, note the web URL (IP address). You will need the URL when you exit from the console and follow the instructions in Connect the VMware Sensor to USM Anywhere
- If your system does not set an IP address automatically, a message box confirms that the system was unable to acquire an IP address from a DHCP server after you change the sysadmin password.
- In this case, you must manually set a static IP address so that it remains unchanged in the future.
Configure a Static IP Address
- Go to Network Configuration > Configure Management Interface > Set a Static Management IP Address.
- Enter the IP address, subnet, and gateway information in each screen.
- Press Enter.
Configure Domain Name System
- Go to Network Configuration > Configure DNS.
- Enter the primary DNS and press Enter.

- (Optional.) Enter the secondary DNS and press Enter.A text box opens to confirm that you want to apply changes.
- Press Enter.

Related Articles
USM Anywhere Sensor Deployments
Before you deploy a USM Anywhere Sensor, you must configure your firewall permissions to enable the required connectivity for the new sensor. Initial deployment of a sensor requires that you open egress or outbound ports and protocols in the firewall ...Hyper-V Sensor Deployment
Review the following prerequisites to ensure an efficient setup and configuration of a USM Anywhere Sensor on Microsoft Hyper-V. Minimum Requirements These are the minimum requirements needed to set up and configure a USM Anywhere Sensor on Hyper-V: ...AWS Sensor Deployment
Requirements for AWS Sensor Deployment USM Anywhere deploys the Amazon Web Services (AWS) Sensor in the Amazon Elastic Compute Cloud (EC2) platform through the Amazon Virtual Private Cloud (VPC). This table includes the requirements for the AWS ...Azure Sensor Deployment
Requirements for Azure Sensor Deployment To ensure that you can successfully deploy USM Anywhere in your Microsoft Azure subscription and monitor all of your Azure resources, make sure you have the following available in your Azure environment: An ...Forward NXLog Messages Directly to a USM Anywhere Sensor
Please follow the steps below to configure NXLog for your Windows Host: On your Windows host, download and install the latest version of NXLog from their website: https://nxlog.co/downloads/nxlog-ce#nxlog-community-edition. On the download page ...